Slack/Teams Integration
Overview
Using the extension "Slack/Teams Integration", you can post review correction requests and confirmation requests from Lightning Review to Slack or Microsoft Teams.
Because the post text containing the path of the review file and the ID of the comment is automatically created,
You can contact the review members with just mouse operations, and share information quickly.
Here, we will introduce the operation and setting method of the extension "Slack/Teams Integration".
Installation
-
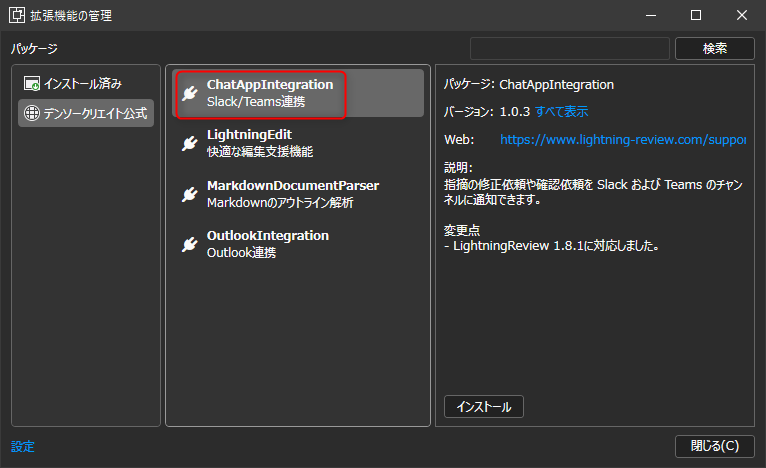
Click [Tools] menu - [Manage Extensions] to launch the [Manage Extensions] dialog.
-
Select [Slack/Teams Integration] from [DENSO CREATE Official].
You can find it quickly by entering "Slack" or "Teams" in the search box. -
Click the [Install] button.
-
Restart Lightning Review.
Register a channel to link
-
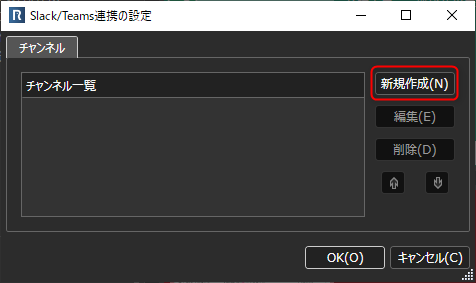
Click [Tools] menu - [Slack/Teams Link] to launch the [Slack/Teams Link] dialog.
-
Click [Create New].
-
In the [Channel Settings] dialog, do the following.
- Name: Enter the name of the link settings to be managed on the tool.
- Target Tool: Select the tool to link to.
- URL: Enter the link URL created on the Slack/Microsoft Teams side.
Please refer to the following link for how to obtain the URL. : "Get URL for linking"
After setting the above, click the [Test Send] link to post a test message to the channel.

Post a correction/confirmation request
Corrections and correction results of review issues can be posted to the linked tool using the following method.
-
Select the target issue in [Tile View] or [Grid View].
If no issue is selected, all issues other than those with a [Confirmed] status will be targeted. -
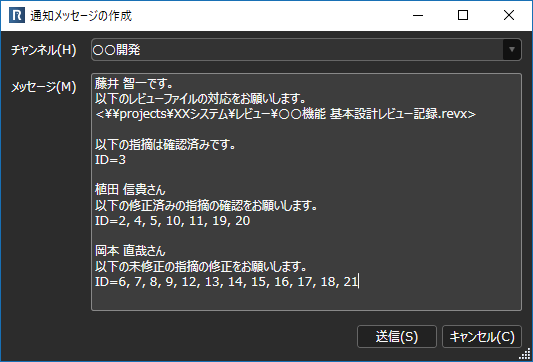
Click the [Tools] - [Create Notification Message] menu to launch the [Create Notification Message] dialog box.
You can also launch it from the [Create Notification Message] menu in the context menu. -
From the [Channel] list, select the channel you want to post to.
-
Edit the message field as necessary and click the [Send] button.