Integrating with Excel
Overview
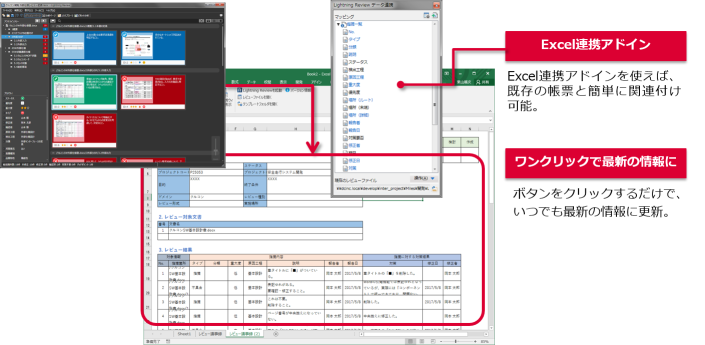
Lightning Review has an Excel integration add-in that outputs review results to Excel meeting minutes.
By using the Excel integration add-in, you can output review meeting minutes in the Excel format you've been using.
This is reassuring even if a specific format for meeting minutes is required.
This section explains how to output review results to Excel using the Excel integration add-in.
Outputting Review Results to Excel
You can easily output review results using the following steps, without having to prepare Excel meeting minutes in advance.
-
Open the target review file.
-
Open the Excel file to which you want to add meeting minutes.
-
Click "Add Review Meeting Minutes Sheet" on the "Lightning Review" tab in Excel.

The review meeting minutes sheet is added, and the comments registered in Lightning Review are output.
Importing Images
In addition to the feedback information, you can also import feedback images and corrected images.
Before exporting to Excel, check "Import Images" in the [Lightning Review] tab of Excel.

A separate sheet will be automatically created from the feedback sheet, and the images will be exported.
Clicking "Re-import" in the [Lightning Review] tab of Excel will import the images along with the data in the associated fields.
Exporting Multiple Review Results Together
You can export information from multiple reviews together to the Excel meeting minutes.
- Click "Add Review Meeting Minutes Sheets in Bulk" in the [Lightning Review] tab of Excel.

- Select the folder where the review files are stored. Add a sheet for each review file in the folder containing review minutes, and the findings registered in Lightning Review will be imported.
Customizing the contents of the review minutes
You can freely customize the information and location imported into Excel. This allows you to utilize existing meeting minutes and reports.
"How to output review results to any Excel report" (../../knowledge-base/faq/faq_05.md)"

The customization procedure is as follows:
-
Open the target review file.
-
Open the Excel file into which you want to import the findings registered in Lightning Review.
-
Click "Show Data Integration Window" on the "Lightning Review" tab in Excel. 4. Click "Set Current Review as Import Target" in the [Lightning Review Data Integration] dialog box.
-
Drag and drop the field names displayed in the [Mapping] section of the [Lightning Review Data Integration] dialog box into the Excel table you want to associate.
If you map from the list, fields with the same name in the table will be automatically mapped.
- Click "Re-import" on the [Lightning Review] tab in Excel.
The data of the fields associated using the above steps will be output to the Excel table.
Mapping Status Setting Date and Setting Person
By default, review statuses map the setting date and setting person for "Created," "Considered," and "Approved."
To map with other statuses, add the setting date and setting person for the required status using the following steps:
-
Perform steps 1-4 of "Customizing Review Meeting Minutes."
-
Click "Operations" in the [Lightning Review Data Integration] dialog box, and then click "Add Status Setting Date (Setter) Mapping to Selected Cells".
-
In the box of the [Add Status Setting Date (Setter) Mapping to Selected Cells] dialog box, enter the added status name and click "OK".
This maps the setting date and setter for the added status, and the associated status data is imported into the Excel table.
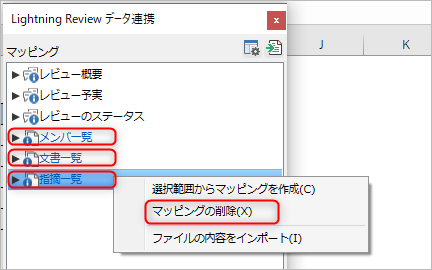
Deleting List Mappings
The following lists have a limited mapping range in Excel. If you want to map to cells outside that range, you need to delete the list mapping first.
- Member List
- Document List
- Issue List
The deletion method is as follows:
-
Open the mapped Excel file.
-
Click "Show Data Integration Window" on the "Lightning Review" tab in Excel.
-
Right-click the list of items to be removed and select "Remove Mapping".
After deleting the mapping from the list, re-map the list and then map the individual fields.
When mapping from the list, if there are fields with the same name in the table, they will be mapped automatically.
Changing the Review Minutes Template
The review minutes are provided by default, but you can change them to review minutes created by the user.
The procedure for changing them is as follows:
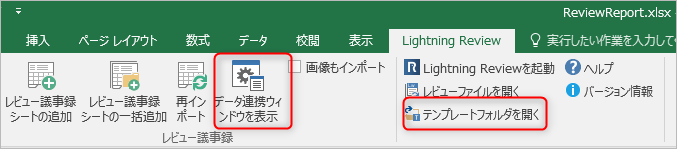
- Create a review minutes file to be used as a template, named "ReviewReport.xlsx".
- In [Show Data Link Window], map the fields to be output to the items on the sheet and save.
For mapping instructions, please refer to the following link: "Customizing the contents of the review meeting minutes" - Open the template folder using [Open Template Folder].
- Overwrite the existing file in the template folder with the created review meeting minutes file.
From now on, the review meeting minutes will be created using the overwritten review meeting minutes file.